Favorite Recipes: Vegetable Pot Pie

We all have those friends who just make us happy by being themselves.  Crystal is like that. Her creative and fun Facebook posts and emails often bring a smile to my face during an otherwise stressful day.  Oh, and she’s an awesome photographer. My kids love how she gets down on their level and plays with them. They forget all about having their picture taken, which actually results in some of the coolest shots of them I’ve ever seen.

****************************************************

By Crystal Courtney

Veggie Pot PieThis recipe is a big hit all fall and winter long around our house. (As well as at potlucks, and as gifts for new parents, or anyone who needs a hot meal delivered.) It is so delicious, you don’t even miss the meat. But if you just can’t live without meat in your pie, you can use a pre-cooked rotisserie chicken from the grocery store to bulk it up. You can make this recipe ahead of time, too. I really like to double the recipe and freeze one pie for another day. Just be sure to freeze before you bake it. Then remove from the freezer and place in the fridge at least 24 hours before you want to bake it!

Vegetable Pot Pie

4 tablespoons butter
1/2 cup onions, chopped
1/4 cup celery, chopped
3 tablespoons flour
2 cups chicken broth
1/2 cup milk
1/2 cup carrots, chopped
1 cup red potatoes, diced
1/2 cup frozen peas
2 refrigerated pie crusts

Preheat oven to 400.
In a large non-stick pot, melt butter.
Saute onions and celery for 2 minutes; season with salt & pepper.
Add the flour to the mixture, stirring constantly to form a blond roux.
Gradually add the chicken broth and bring to a boil.
Reduce to a simmer and continue to cook for 4-6 minutes, or until sauce thickens.
Stir in the milk and cook, stirring for 4 more minutes.
Season with salt and pepper to taste.
Stir in the potatoes, carrots, and peas. Mix thoroughly with filling.
Cook until tender, 10-12 minutes.
Place 1 pie crust in 8×8 square or round casserole dish. Pour filling into crust and top with second crust.
Bake for 30 minutes, or until crust is golden brown.

***********************************************************

For  more about Crystal, check out her website, http://crystalchickphoto.com/ and her Facebook page, http://www.facebook.com/crystalchickphotography

Favorite Recipes: Ghetto Pie…Tamale Pie…Yummy Pie

Kim is honestly one of the coolest women I’ve ever known. She has a positive attitude that nothing seems to touch, and is always conjuring up some new way to help those around her.  In fact, she just wrapped up her annual Zumbathon to benefit the Susan G. Komen Fountation.  Oh, and she also sells homes, runs gratitude workshops, and knits!  Check her out. You will be glad you did.

**********************************************************

Ghetto Pie

By Kim Jenkins

One of my family’s favorite thing to eat is a little embarrassing..I always call it ghetto pie, but I think my mother called it Tamale Pie. Whether Ghetto or Tamale, the kids LOVE IT….so whatever works and gets them eating, right?

It’s a combination of ground beef (I use the better quality), tomato sauce, canned corn, olives & cheddar cheese.

That’s it. Seriously.

I brown the meat, mix in a few cans of tomato sauce (you want it to be a little runny or juicy), add some salt, pepper and garlic to taste, then mix in the corn and olives.

It’s also really good after you mix it all together to throw it in the oven at 325 and bake it maybe for 20-25 minutes with some melted cheese on top.

Easy. Economical. Kids love it.

Serve with cornbread and yummmm yummmm….it’s dinnertime!

***********************************************

Here’s how to find out more about Kim (I feel like we need a search engine for this part!).

Kim the Zumba Instructor
http://www.followkimtozumba.com/
http://www.facebook.com/followkimtozumba

Kim the Realtor
http://www.facebook.com/KimJenkinsSellsHomes

Kim the Knitter
http://www.facebook.com/JoyfulKnits

Kim the Gratitude Workshop Facilitator
http://www.facebook.com/GratitudeJournalWorkshop

Kim the Encourager
http://findyourjoy.weebly.com/
http://www.facebook.com/findyourjoy

Favorite Recipes: Italian “Crockpot” Chicken

Tanya has been a blessing in my life for over a year now. As a fellow business owner, we occasionally bounce ideas off of each other and share potential opportunities. I’ve learned so much from her patience and persistence. Her company, M.A.H. Creations, is more than just a business, they seek to help mothers stay at home by providing a marketing and sales outlet for their handmade goods.

I know I’m always a sucker for a good crockpot recipe! Enjoy!

**************************************************************************

Italian “Crockpot” Chicken

By Tanya Franks

4-6 frozen chicken breasts

8oz block cream cheese

1 pkg dry Italian dressing mix

1 can cream chicken soup

1 can cream mushroom soup

½ cup water

Spray crockpot with cooking spray.  Arrange frozen chicken in pot.  Cut cream cheese and put over chicken.  Pour soups and dressing mix on top.  Add water.  Cover and cook on low 8 hours.  After cooking, remove chicken and whisk together soup mixture and serve over chicken.  Serve over cooked rice or pasta

**************************************************************************

What is M.A.H. Creations?

It’s more than a business, it’s a mission! All of our products are made by Moms At Home (M.A.H.). What does that mean as a customer? That means each and every time you shop you are guaranteed that your product has been hand crafted with love and special attention to detail. These talented moms have a passion for what they do and love to express their creativity in the products they offer. That also means that you will receive excellent customer service and personal attention. We appreciate you, our customers, and want you to be thrilled with every purchase.

Favorite Recipes: Brown Sugar and Balsamic Pork Loin with Roasted Veggies

Today’s contributor has been a dear friend of mine for a few years. She has always amazed me with her ability to juggle a busy stationary business with the care of three small children. And somehow she manages to be an excellent cook as well!  Be sure to check out her creative designs at www.pinkpetalpress.com.

***************************************************************************

By Becky Howell

It’s Fall, and although San Diego has clearly confused October with July and we have been dealt 80 degree temperatures this week, the onset of Fall always encourages me to pull out my crock pot. So does the deployment of my husband, and the necessity of surviving the craziness of dinner time with three wild children.  I love being able to throw the pork in before the kids go to school and have the veggies prepped before dinner.  This is one of my favorite crock pot recipes and my pint-sized picky eaters love it!

Brown Sugar and Balsamic Pork Loin with Roasted Veggies:

Ingredients:

1 (2 pound) boneless pork loin

1 teaspoon Italian seasoning

1/2 teaspoon salt

1/4 teaspoon pepper

1 teaspoon garlic powder

1/4 cup water

Glaze

1/2 cup brown sugar

1 tablespoon cornstarch

1/4 cup balsamic vinegar

1/2 cup water

2 tablespoons soy sauce

Directions:

Combine Italian seasoning, salt, pepper and garlic. Rub over roast. Place in slow cooker with 1/4 cup water. Cook on low for 6-8 hours. About 1 hour before roast is done, combine ingredients for glaze in small sauce pan. Heat and stir until mixture thickens. Pour glaze over roast during the last hour of cooking. I like to shred the meat and serve with the glaze drizzled over.

Our favorite side dish is oven roasted veggies.  I have always loved roasted vegetables, and my mom recently introduced me to roasted radishes!  I was skeptical at first because I thought they would be bitter, but they take on a lovey sweet flavor as they roast.  We grow them in our garden so the kids will eat them!  My favorite medley is chopped asparagus, quartered radishes, cubed sweet potato, cubed red potatoes, chopped red onion, mushrooms, and even brussel spouts.  I toss them with 2 table spoons of olive oil, garlic salt, and fresh cracked pepper on a baking sheet.  Roast at 350 for about 40 minutes or until they are fork tender, stirring after 20 minutes.

Hope y’all enjoy this recipe as much as we do!

***********************************************************************************’

Find more about Becky and her business at:

https://www.facebook.com/pages/Pink-Petal-Press/209283682523
www.pinkpetalpress.com

Favorite Recipes: Great-Grandma’s Carmel Corn

My great-grandmother holding my daughter.

My great-grandmother holding my daughter.

I have been very fortunate in my life to have had the opportunity to know not just my grandparents, but also several great-grandparents and one great, great grandmother.   I remember sitting at the kitchen table as a child and watching my mother and grandmothers bustle around the kitchen making homemade apple pies, bread, or just a huge family meal.

My great-grandmother and I were especially close.  She was my own personal daycare while my parents worked.  She spent her days teaching me how to cook, sew, and play a wicked game of Farkle.  When we baked homemade bread, she would give me my own little loaf to knead.  She must have cringed inwardly as I proudly handed it back, my grubby little hands adding in more than a little dirt for flavor.

When I asked my mother to participate in this little recipe round up, she sent me this recipe from my great-grandmother.  It really got me remembering, not just the endless barrels of the chewy stuff I downed as a child, but also about the wonderful great-grandmother I loved.

**********************************************************************

By Beth Elliott

This recipe came from Great Grandma Staley and has been enjoyed by every generation since.  As children we all helped and loved making it with her, including Jamie.  Somehow we never ended up with the amount the recipe stated you would have because of our constant snacking during the process.  It is very hard to stop at one bite!

Grandma’s Carmel Corn

6 quarts popped corn placed in large tub and set aside.

Syrup as follows:

11/2 sticks butter melted

Stir in:

2 c. brown sugar (packed)

1/2 c. corn syrup

1 tsp. salt

Bring to boil, stirring constantly.

Remove from heat and add:

1/2 tsp. soda

1 tsp. vanilla

Gradually pour over com.  Mix well. Turn onto 2 cookie sheets.  Bake 250 degrees for 1 hour

Stirring every 15 minutes.  Cool and break apart.

Enjoy!

Favorite Recipes: Express Yourself

I had the pleasure of meeting Shannon when we began working together on the SweeT-Shirt blog.  She’s a talented writer and an all around amazing woman. Enjoy!

******************************************************************

By Shannon Milholland

Is your friend having a baby? Did a neighbor recently have a loved one pass? If you’re anything like me you both celebrate and mourn with food. You want to express your love but you don’t have time to spend all day in the kitchen.

Here is my go to menu that’s sure to deliver both your kindness and rave reviews at home.

Main Course – Ranch Chicken

4 – 6 skinless, boneless chicken breasts, cut into three portions

1 package dry Ranch dressing mix

1 cup shredded Parmesan cheese

1 cup crushed Cornflakes

2 – 3 egg whites

Combine Ranch, Parmesan and Cornflakes in one bowl. Place egg whites in another. Dip chicken in egg whites and crumb mixture then place in greased 9×13 pan. Bake 350 for 30-35 minutes or until golden.

Why I love this recipe: The crunchy texture is flavorful and satisfying yet the preparation time is minimal. Best, this dish gets two thumbs up from both two year olds and grown adults.

Veggie Side Dish – Green Bean Bundles

2 cans whole green beans, drained

6 strips turkey bacon, cut in half longwise

½ bottle of Honey French dressing

Wrap 8-10 beans in each strip of bacon. Place in 9×13 greased pan and cover with dressing. Marinate for two hours for best flavor. Bake at 400 degrees for 20 minutes.

Why I love this recipe: Have been dreaming of a veggie recipe which comes from a can but tastes like it’s fresh from the garden? The turkey and salad dressing add a sweet and savory flavor that make canned green beans a busy woman’s dream. No one has to know the beans are canned. It’s our little secret.

Salad – Spinach and Strawberry Salad with Poppy Seed Dressing

Salad:

10 ounces of fresh spinach

1 quart strawberries, sliced

Dressing:

½ cup canola oil

½ cup granulated sugar

¼ cup red wine vinegar

2 tablespoons sesame seed

1 tablespoon poppy seed

½ teaspoon minced onion

¼ teaspoon paprika

¼ teaspoon Worcestershire sauce

Place spinach and strawberries in bowl. Combine dressing ingredients (a shakable, topped plastic jar works great). Pour dressing over salad just before serving.

Why I love this recipe: This salad is my mother-in-love’s favorite. If it’s tasty enough to evoke praise from your mother-in-law, what’s not to love? Honestly, this salad is so good it’s like eating spinach for dessert!

Derby Pie

1 pre-prepared pie shell from the refrigerated bread case

1 cup chocolate chips

1 cup chopped pecans

1 stick butter, softened

1 teaspoon vanilla extract

1 cup granulated sugar

½ cup all-purpose flour

Beat all ingredients except pie shell. Place shell in greased, deep dish pie pan. Fill with mixture. Bake 375 for 30-35 minutes or until golden and set.

Why I love this recipe: This is a one bowl, limited preparation dessert that will have your family and your friends begging for more.

Thanks for stopping by the Milholland dinner table. You’re welcome here for dinner a glass of orange juice anytime.

******************************************************************

Shannon is the author of Jesus & My Orange Juice, a fresh-squeezed oasis for ordinary living. She finds contentment among miles of carpools and piles of laundry and delights in leading others to this place of joy in life.

She is also contributing author to a number of blogs including Sweet Shirt, Encouragement Café and Keeping it Personal. When she isn’t blogging, she’s the Social Media Director for Southern Writers Magazine for whom she blogs and writes articles.

At home she is wife to Scott and mom to four precious daughters. Connect with her online at her blog, her website and on Facebook and Twitter.

New Series: Favorite Recipes and Honey Maple Caramel Corn

This week we’re starting a brand new series.  I’ve asked my friends and family to submit their favorite go-to recipes to share with our readers.  It can be that dish that they run to when they need a good homemade dinner without a lot of planning, that one appetizer that everyone begs them to bring to the party, or just something they enjoy making with their family.

Today’s recipe is from Gabreial Wyatt, editor of Vintage Indie, and one of my Facebook friends. 🙂  If you’re looking for a perfect snack for autumn, this is it!  Enjoy!

*****************************************************************

Honey Maple Caramel Corn

By Gabreial Wyatt

Ingredients

Ingredients:

1 Cup Organic Popping Corn Kernels

4 T Butter ( I used Amish Salted Rolled Butter)

1 T Unsulphured Molasses

1/3c. Raw Filtered Honey

3 T Grade B Maple Syrup

1/2t. Pink Sea Salt (or any salt you prefer)

1t. Vanilla Extract

1/2t. Baking Powder

Directions

Directions: 

Preheat oven to 300.

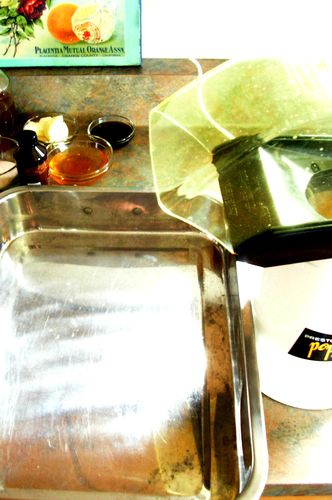
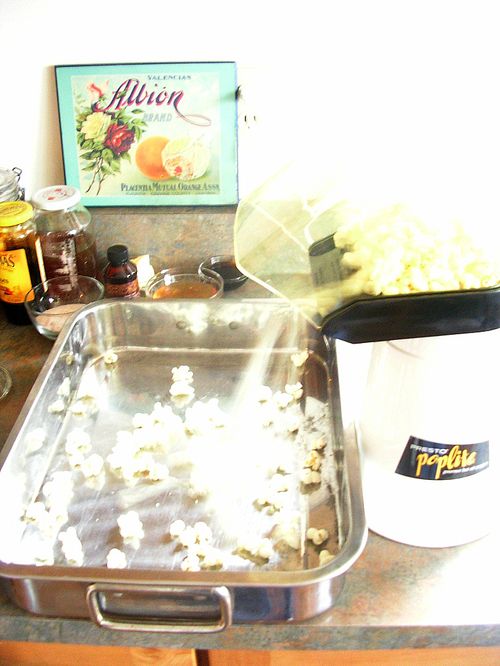
Step One – Pop One Cup of Corn Kernals into a large lasagna pan. I use an air popper which requires no oil. We love it.

Step One

I didn’t quite use the full cup, I ran out of room in my pan. This was two cycles in the popper.

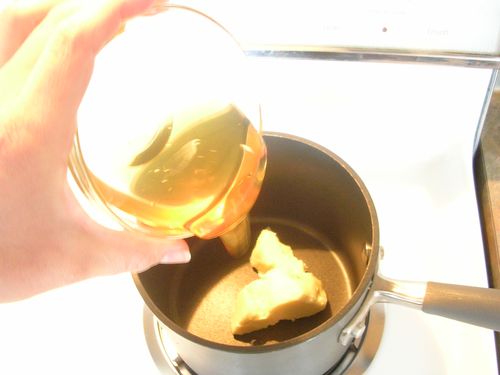
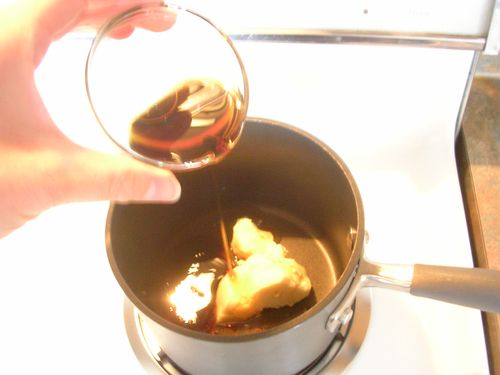
Step Two – in a small saucepan add remaining ingredients except for the vanilla.

4 T Butter ( I used Amish Salted Rolled Butter )

1 T Unsulphured Molasses

1/3c. Raw Filtered Honey

3 T Grade B Maple Syrup

1/2 t. Pink Sea Salt (or any salt you prefer)

Honey & Butter

Honey & Butter

Molasses

Molasses

 Maple Syrup & Salt

Maple Syrup & Salt

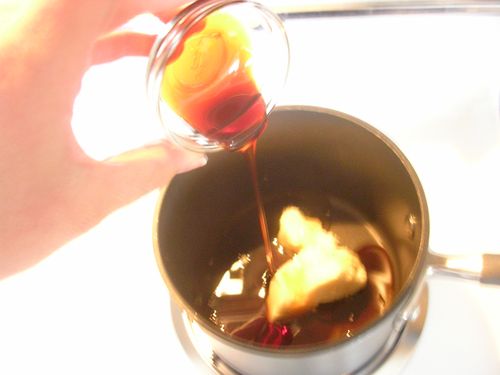
Warm on the stove medium high heat until it comes to a rolling boil. Once it comes to a rolling boil, boil for three minutes stirring and being careful not to burn.

Step Four

Step Four – Remove from stove and stir in vanilla and baking powder. Continue to stir so that the mixture does not overflow in your pan.

Step Five

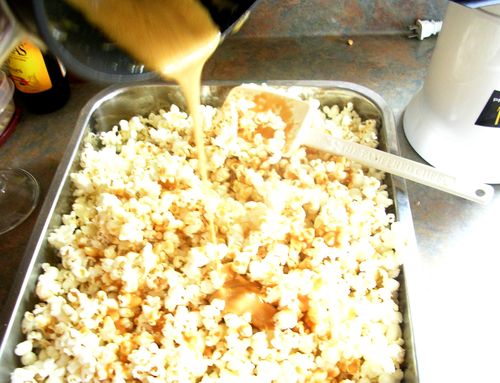
Step Five – Pour mixture over popcorn. Stir to combine. Don’t worry if it doesn’t coat all of it.

Step Six – Place in the 300 degree oven for 15 min, checking not to burn. Remove from oven and stir mixture from the bottom up. Place back in the oven for another 10 minutes. Remove and let cool, stirring again if you’d like.

I didn’t have very much stick to the pan, if you’d like you could coat the pan with a cooking spray. They make that in an organic variety now too.

Honey Maple Caramel Corn

*****************************************************************

Vintage Indie started out as a love for all things vintage, vintage inspired and antique related. Being a mother and an entrepreneur herself, founding editor Gabreial Wyatt has a passion to support independent small businesses owners, artists and designers.

It is our goal to give life to older things once disregarded and blend them with the world that we live in today. Find useful do-it-yourself projects, handmade goods, inspirations, book reviews, events and products to render that feeling of nostalgia in today’s fast paced society, all while supporting the independent business owner.

 You’ll also find our love for home educating mixed throughout along with our passion for traveling and learning by seeing as well organic and whole living.

We hope you enjoy what you find and read here at Vintage Indie and we hope to become your magazine for all things vintage within your modern life.

  – Gabreial Wyatt, Editor in Chief

Recipes and Aprons: Potluck Au Gratin

When I was assigned to bring the potatoes to our family Easter get together this weekend, I groaned.  Images of spending my Easter Sunday peeling and boiling an endless parade of tubers flashed before my eyes.  Desperate to find a way to salvage the afternoon with my family, I started searching for an alternative, and came across this recipe for an Au Gratin potato casserole.

When I saw how easy it was, I didn’t have very high expectations for the taste, but was willing to sacrifice that for some much needed cuddle time with my kids.  I was pleasantly surprised, however, with just how tasty this easy casserole turned out to be.

So the next time you pull the “potato” straw for your next potluck, forgo the same old potato salad for something warm and delicious.

The Recipe: Au Gratin Potato Casserole

The Apron: The Betty Pink Fabric Apron with Zebra Ties

Since I found this recipe as a result of wanting to spend more time with my girls, I chose this apron because it seems to be their favorite.  They love to hide behind the full skirt. 🙂

Recipes and Aprons: Candy Sushi

Candy SushiSeveral weeks ago, my eldest child’s teacher sent home a note that the class would be performing a Japanese tea ceremony on March 21. The children painted homemade kimonos and learned about Japanese culture and traditions as they prepared for the event. When she sent home the list of requested items, I immediately picked Candy Sushi. In a family that adores Sushi, I had never heard of a candy version and was eager to try it out.

Little did her teacher know when she created her lesson plan just how much not only her class, but the entire world would be thinking about Japan in the days leading up to the ceremony.  As I prepared the candy sushi tonight, I tried to think of any small way we could help.

So, in honor of our friends in Japan, Swanky Aprons will be donating 10% of all online sales from now through March 31st to the Red Cross Fund for the Japan Earthquake and Pacific Tsunami.  I’d also like to encourage you to donate $10 to the Red Cross by texting REDCROSS to 90999.

OK, time for the recipe!  I have to say it is sticky but fun to make, and anything based on a Rice Krispie treat is yummy in my book! 🙂

The Recipe: Candy Sushi

  • 8 fruit rollups
  • ½ cup butter or margarine
  • 1 10.5 oz. package of mini marshmallows
  • 16 gummy worms or 24 fish shaped gummy candies
  • 6 cups Rice Krispies® cereal

1)      Unroll fruit rollups and place, plastic side down, on a cutting board.  If you live in a hot and humid climate like I do, you might want to pop them in the freezer for 5 minutes first so they are easier to unroll.

2)      Melt butter in Dutch oven over medium heat.

3)      Add marshmallows, stirring constantly until melted.

4)      Fold in Rice Krispies until coated.

5)      Immediately spread 1/3 cup of the Rice Krispie mixture over the fruit rollup, leaving a one inch margin along one long edge of the fruit rollup.

6)      Place two worms or three fish in the center of the cereal mixture end-to-end.

7)      Roll up each roll, beginning at the side without the border.

8)      Carefully peel off the plastic (again, you might want to pop them in the freezer for five minutes to make the plastic easier to peel).

9)      Cut each roll into four equal pieces.

10)   Serve with chopsticks.

11)   Enjoy!

Women's Original Cherry Blossom Apron

Women's Original Cherry Blossom Apron

The Apron: The Women’s Original Cherry Blossom Apron

With its Asian-inspired theme, the Cherry Blossom Apron was a natural choice for the companion apron to this recipe.

Recipes and Aprons: Spring is Coming!

This time of year I anxiously anticipate spring and my dinner menu tends to reflect a more tropical/summer theme.  It’s like I think I can hasten the coming of warmer weather by serving food appropriate for a beach vacation or a backyard barbecue. 🙂

One of my favorite (and easiest!) recipes for Spring and Summer is Shrimp Scampi.  Its light flavor and short preparation time make it perfect for an impromptu dinner on the back patio.

The Recipe: Shrimp Scampi

  • 12 oz. package angel hair pasta
  • 1 lb. deveined and peeled shrimp
  • 1 can chicken broth
  • 1 tsp garlic powder
  • 1 bunch green onions, chopped
  • 2 tablespoons lemon juice
  • ½ bunch chopped cilantro

1)      Prepare pasta according to package directions.

2)      At the same time, over medium heat, combine rest of ingredients and cook until shrimp are opaque, about 7-9 minutes, depending on shrimp size.

3)      Serve shrimp mixture over pasta. (I like to serve mine with garlic bread too!)

Enjoy!

The Betty Double Band Green/White Dot w/Pink TiesThe Apron: The Betty Double Band Green and White Polka Dot Apron with Pink Ties

This Springy apron is perfect for March, and its full coverage will ensure that none of that shrimp juice winds up on your favorite blouse! 🙂